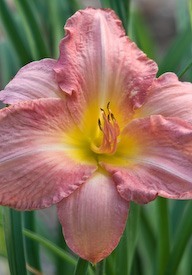
Follow these daylily planting and care tips for success with these easy-to-grow plants. Although tolerant of neglect, daylilies thrive with careful treatment, including full sun and decent soil.
These perennials create the most impact when planted in masses or sweeping groups for lots of mid-summer color, and they are particularly effective in country gardens.
Step-by-step daylily planting and care tips
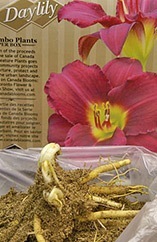
Bare root for planting
Planting: The best time to plant daylilies is in spring or autumn, but if you buy container-grown plants you can plant them out any time during the growing season.
Just avoid periods of drought, unless you are prepared to water your new plants faithfully.
Improve your soil by working in some compost in before planting. Recommended planting distance is 18 to 24 inches apart. Your planting hole should be a little larger than the root mass.
The crown (band of white on the foliage) is the indicator for depth as this should be just below the surface. Set the plant so that the crown is no deeper than inch below the surface of the soil.
Firm the soil after planting, using your hands (pressing or stomping with your feet can cause root damage).
Watering: Water plants thoroughly after planting, and continue to deep soak them at least weekly until established (about six to eight weeks). Although daylilies are drought-tolerant once established, consistent watering while they are budding and flowering will produce better-quality flowers.
Mulching and fertilizing: Mulch your daylily beds with compost in spring. Avoid giving daylilies high nitrogen fertilizers as this promotes more foliage growth at the expense of flowers. Fertilizers with 5-10-15 and 6-12-12 are low in nitrogen and provide good ratios of phosphorous and potash.
Daylily planting and care tips: grooming, division
Grooming: Daylilies look best if you give them some grooming through the season. At the beginning of the growing season remove any old damaged foliage from around the clumps.
Remove spent blooms and seedheads after flowering to keep your plants neat looking and to encourage rebloom.
When all the flowers on a scape (flower stalk) are finished, cut off the scape close to ground level. Remove dead foliage from daylilies as they die back in the fall.
Dividing: Division is not essential, but it can result in better flowering if the plants have become crowded and overgrown. The job is usually done after flowering, but daylilies are such tough plants that they will tolerate dividing throughout the growing season.
To divide a clump, cut into the soil around the plant with a spade and then lift the entire clump out of the soil with a garden fork.
To separate the plant into individual fans (a grouping of leaves with roots attached), shake it to remove as much soil as possible. If necessary, use a hose to wash away excess soil, then work the roots apart into good-sized clumps.
Daylily problems – fungus diseases: Daylily problems used to be uncommon, but during the past decade these perennials have been attacked by two new diseases, streak and rust. Rust is more serious than streak, and because it’s easy to confuse the two diseases, it’s good to be able to spot the differences. Find out how to control daylily fungus diseases.
Related Information
More perennials for your garden


