Clematis has been called “queen of the climbers”, and it’s a must-have vine for flower gardens.Vigorous and beautiful, this climbing vine is available in many guises.
The species have graceful nodding flowers and the large-blooming hybrids come in a variety of colours and flower types from single and ruffled to double.
Choosing and planting clematis vines
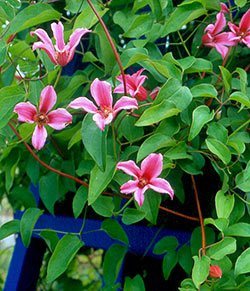
‘Duchess of Albany’
You’ll find that plenty of varieties for blooms through the season – some are spring bloomers, others flower in mid-season into late summer or autumn.
With proper planting and care, and a little patience on your part, your vine will reward you with multiple stems full of flowers.
At a nursery, select a plant with a good 12-14 inches of healthy growth on multiple stems. Give your vine rich, moist, but well drained soil.
Choose your site with care because once settled into place, this vine doesn’t like to be moved. Planting in spring is preferable.
Clematis prefers its roots cool and top growth in the sun, so mulch over the roots, but don’t mound the material right on top of stems. Avoid planting varieties with delicate-colored flowers in full afternoon sun because this will bleach out the color.
HOW TO PLANT YOUR VINE
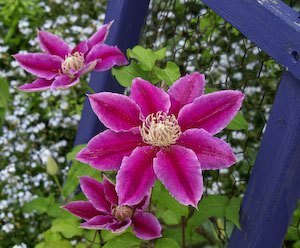
Popular cultivar ‘Dr. Ruppel’
Photo: © Y.Cunnington
- Dig a hole about 18 inches deep and wide; set aside the soil you have removed. Place two shovels of well-rotted manure or compost at the bottom of the hole.
- In a wheelbarrow, mix several shovels full of well-rotted manure or compost into the soil you removed from the hole. Add part of this mixture, covering the manure at the bottom of the planting hole, and tamp down lightly.
- Before planting, immerse the clematis container in a pail of water for up to 10 minutes to ensure that the roots are well moistened.
- Plant your vine so that the root ball is two inches below soil level. Carefully fill the planting hole with the remaining soil mixture and firm into place with your hands. Don’t worry if the soil is a little high, it will settle.
- Tie stems to a support to direct new growth toward trellising that will support the mature vine.
- Water deeply after planting and, to keep roots cool and preserve moisture, mulch with two to three inches of material such as pine bark mixed with a little well rotted manure.
Caring for your clematis vines
Keep newly planted vines moist by watering them thoroughly at least once a week during the first couple of seasons, especially in dry periods.
In the first spring after planting, all new vines should be pruned to a height of twelve inches to encourage strong bushy growth at the base, so the plant doesn’t just grow one or two lanky stems. Do this early, before leaf buds open, cutting each stem back to a pair of strong axial buds. You may give up some flowers in the short run, but the reward is many more flowers in the seasons to come.
A newly planted vine needs at least two years to become established, but after that it just keeps on getting better.
Pruning clematis
How you prune in subsequent years depends on the type of clematis you have. Generally, varieties that bloom on newly-grown stems each season should be pruned to within 24 to 30 inches of the soil level in early spring before buds open.
Those that bloom on stems produced the previous season should be pruned after flowering, cutting out dead or weak stems to tidy up the vines. For more detailed information on pruning, be sure to look at and keep the nursery tag that came with your plant.
Vines for Sun & Shade
Favorite vines for sunny gardens.
Climbing vines for shade


