You can learn to take better garden pictures with a few simple tricks of the trade.
With everthing digital, it’s not as difficult as it used to be to keep a photographic record of your garden and the plants you grow.
A photo album – or more likely a folder in your computer – devoted to your garden can be a great reference, as gardens change a good deal with time.
Keeping track of your garden’s progress
Photos are an invaluable record to help you chart your garden’s progress, especially, if you are renovating your outdoor space.
Remember to take lots of “before” and “after” pictures of each stage and season of your garden. Over the years, you’ll be amazed at how your plants have grown. Once you have learned to take better garden pictures digitally, be sure to keep track of them, and back them up.
Top tips to take better garden pictures:
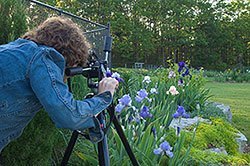
Use a tripod. It’s difficult to keep a camera completely steady without a tripod. Hand-held photographs, especially those taken in lower light conditions often suffer from “camera shake.” The result: blurry pictures from camera movement.
A tripod makes a great tool for better composition. Even with cameras and lenses that have “anti-shake” technology, using a tripod forces you to slow down and take more time to compose and frame your pictures.
Shoot early in the morning. Follow this tip and you will take better garden pictures all season long, guaranteed. The light is softer early in the day, and flowers and leaves often have dew or raindrops that can add interest, especially for close-ups.
Mornings are also ideal for low wind. There is often no breeze or wind early in the day, which cuts down on motion-blur to keep your flower and garden scenes sharp.
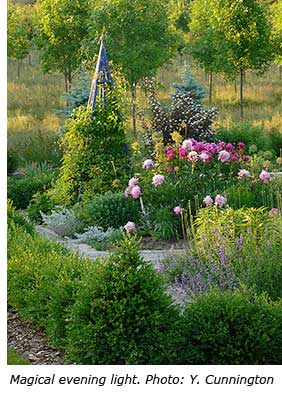
Bright, sunny afternoons are the worst time to take garden pictures. That’s because the sun casts contrasty shadows that look black, and the harsh light washes out flower colors. However, another good time for pictures is in early evening when the light becomes soft and warm again, as in the picture (right).
Calm, overcast days also let you take better garden pictures. On such days, the bright white sky acts as a huge reflector, intensifying leaf and flower colors. Just be sure to compose your pictures so that you crop out sweeps of white sky.
White sky can confound your camera’s light meter. Be careful about having sky in your pictures. If it’s bright and white-looking, it can make the subject of your picture look too dark. However, by leaving the sky out of your composition and focusing on plants and garden beds, you can avoid this problem.
Weed and groom your garden before taking pictures. Things your eye skips over in real time – dry twigs or faded flowers, or a hose left on the grass – are very distracting in a photo, so look carefully before you press the shutter.

Filling the frame with the subject
Photo: © Y.Cunnington
Fill the frame with your subject. Get in close for a great picture of your perfect peony, and keep your background as uncluttered as possible.
If your subject is in shade, avoid bright backgrounds. Focus on what drew you to take that particular picture. Most people try to get too much into a single photo, so ask yourself: What is this picture really about?
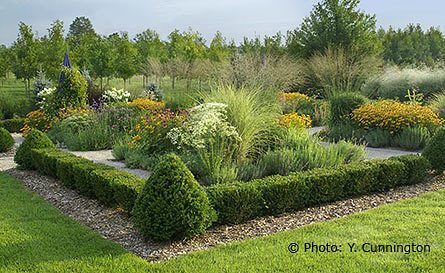
For a fresh take on your garden, try different view points. We all get used to seeing our own gardens from particular spots. To break out of the predictable, get down low to photograph low-growing plants, or take a stepladder (as I did in the picture below) or shoot from an upstairs window to look down a garden bed. Try photographing from behind or even in a flowerbed.
Use lines in the landscape to suggest depth. Cameras turn three-dimensional subjects into flat two-dimensional photos. A common pro trick to add depth is to use lines in a scene on a diagonal, as in the example here:
Use diagonal lines to suggest more depth in a picture
Take better garden pictures for planning
Take lots of photos through the season. This is easier than ever with digital as you don’t have to worry about the cost of film and developing. Go out every two to three weeks.
Then, use the photos to keep a record of what you like – such as great plant combinations – or to assess areas that need improvement.
A panoramic view is useful for visualizing change. Stand in one spot and take two or three different garden photos, making sure each frame overlaps the previous one slightly.
- Then you can tape your prints together for a complete overview of the garden.
- Even better, with a photo-editing program on your computer, you can ‘stitch’ digital pictures together to create a single image.
- Blow this picture up, print it, and cover it with see-through tracing paper. You can draw on the tracing paper to help you visualize landscaping changes, such as what your garden will look like when young trees have grown taller.
Related Information
Flower garden planning tips: Bed width, spacing of perennials,
garden accents and focal points
Color in the garden: How you can create great color schemes


